
# Commutator Maintenance Guide: Keep Your Power Tool Armature Running Smoothly
The commutator is the most-critical — and most-neglected — component of any power tool armature. It’s the mechanical interface where stationary carbon brushes transfer electrical current to the rotating windings. When the commutator is in good condition, the tool delivers full power with minimal sparking. When it’s neglected, you get arcing, overheating, and premature armature failure.
Yet many technicians and repair shops treat commutator maintenance as an afterthought. Brushes get replaced without inspecting the commutator surface. Burn marks are ignored. Grooves go unnoticed until the armature is beyond repair.
This commutator maintenance guide covers everything you need to know: what a commutator does, how to inspect it, when and how to clean or resurface it, and how to troubleshoot common commutator problems before they destroy your armatures.
## What Is a Commutator and Why Does It Matter?
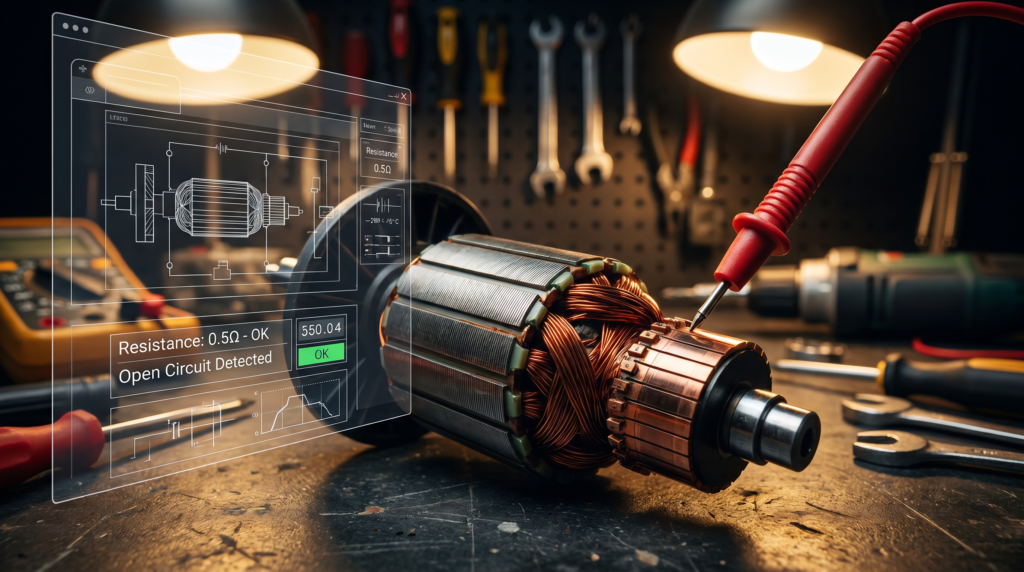
The commutator is the copper-segmented cylinder pressed onto the armature shaft. It consists of individual copper bars (segments) separated by mica insulation. Each segment connects to a different armature coil winding.
As the armature spins, carbon brushes slide across the commutator surface, making and breaking contact with each segment in sequence. This mechanical commutation converts the DC current into the alternating magnetic field needed to keep the motor spinning.
A healthy commutator has:
– **Smooth, polished copper surface** — Minimal friction against brushes
– **Clean mica undercut** — The insulation between bars sits slightly below the copper surface
– **Uniform segment color** — No blackened or burnt bars
– **Consistent bar spacing** — No lifted or shifted segments
When the commutator deteriorates, every revolution damages the brushes slightly more, creating a feedback loop that accelerates wear on both components.
## Signs Your Commutator Needs Maintenance
Catching commutator problems early saves the entire armature. Look for these warning signs:
### 1. Excessive Brush Sparking
Some sparking is normal during startup or under heavy load. But constant, visible sparking at the brush-commutator interface means the commutator surface is compromised.
**What to check:** Remove the brushes and inspect the commutator surface. If it’s blackened, grooved, or uneven, it needs attention.
### 2. Grooves or Ridges on the Commutator Surface
Run your fingernail lightly across the commutator surface. If you feel grooves, ridges, or a “washboard” texture, the commutator has uneven wear.
**What causes this:** Abrasive brush grades, contaminated brushes, or a worn brush holder that doesn’t keep the brush perpendicular to the commutator.
### 3. Blackened or Burnt Copper Bars
Individual commutator bars that are darker than their neighbors indicate an electrical problem in that specific coil winding. This is often a sign of a shorted armature coil.
**What to check:** If one or two bars are blackened but the rest look clean, the armature likely has a winding short — cleaning the commutator won’t fix this.
### 4. Lifted or Raised Copper Segments
Copper is softer than the steel shaft it’s mounted on. Under extreme heat or centrifugal force, individual commutator bars can lift slightly above the surrounding surface.
**What this means:** This is a catastrophic failure sign. The brush will bounce over the lifted bar at high speed, causing severe sparking and rapid commutator destruction. The armature needs replacement, not repair.
### 5. Copper “Fins” or Fraying at Segment Edges
Over time, the copper at the trailing edge of each commutator bar can extrude outward, forming thin fins. These fins bridge the gap between adjacent bars, creating shorts.
**What to do:** The commutator needs to be turned (machined) on a lathe to remove the fins and restore proper geometry.
## Essential Commutator Maintenance Tools
Before performing any commutator maintenance, make sure you have the right tools:
| Tool | Purpose |
|——|———|
| Commutator stone (medium and fine grit) | Manual resurfacing and cleaning |
| Undercutting file or saw | Removing mica between bars |
| 400-600 grit sandpaper | Final polishing after stoning |
| Caliper or micrometer | Measuring commutator diameter |
| Growler tester | Detecting shorted armature windings |
| Multimeter with continuity | Testing resistance between bars |
| Commutator lathe or turning attachment | Professional resurfacing |
| Compressed air | Cleaning carbon dust after maintenance |
For occasional maintenance, a commutator stone and sandpaper will handle most cleaning jobs. For professional armature rebuilding, a dedicated commutator lathe is essential.
## Step-by-Step Commutator Maintenance
### Step 1: Inspection and Diagnosis
Before touching the commutator, perform a thorough inspection:
1. **Visual check** — Look for blackened bars, uneven coloring, burrs, or fins
2. **Surface feel** — Run your fingernail across the surface; it should feel smooth, not grooved
3. **Bar-to-bar resistance** — Use a multimeter to measure resistance between adjacent commutator bars. Each pair should read the same value. A reading that differs significantly from the others indicates a winding issue
4. **Ground test** — Check resistance between any commutator bar and the armature shaft. It should show infinite resistance (no continuity). Any reading indicates a grounded armature
5. **Growler test** — Place the armature on a growler and hold a hacksaw blade over the core while rotating. If the blade vibrates over any slot, that coil has a short
If the armature fails these electrical tests, commutator maintenance alone won’t fix it. The armature needs rewinding or replacement.
### Step 2: Cleaning the Commutator
For light oxidation or carbon film buildup:
1. Remove the armature from the tool
2. Use a clean cloth lightly moistened with electrical contact cleaner to wipe the commutator surface
3. For stubborn carbon deposits, use a commutator cleaner stick or a very fine commutator stone (600 grit equivalent)
4. Blow out all carbon dust with compressed air
5. Wipe clean with a lint-free cloth
This is sufficient for commutators that are in good condition but have light surface contamination from normal brush wear.
### Step 3: Stoning (Light Resurfacing)
For commutators with light grooving or discoloration:
1. Select a fine-grit commutator stone (around 400-600 grit)
2. Hold the stone against the commutator while rotating the armature at moderate speed (either in a lathe or by hand — never use the tool itself to spin the armature for this)
3. Move the stone smoothly across the surface, covering the full commutator width
4. Continue until the entire surface shows uniform copper color with no dark spots or grooves
5. Finish with 600 grit sandpaper for a polished surface
6. Clean thoroughly with compressed air
**CRITICAL:** Never use emery cloth or sandpaper containing aluminum oxide on a commutator. The abrasive particles can embed in the copper and damage brushes. Use only genuine commutator stones or silicon carbide sandpaper.
### Step 4: Professional Turning (Heavy Resurfacing)
For commutators with deep grooves, fins, or uneven wear:
1. Mount the armature in a lathe with the commutator centered
2. Use a carbide or diamond-tipped cutting tool
3. Remove only enough material to achieve a clean, round surface (typically 0.1-0.3mm)
4. Measure the commutator diameter — if it’s below the minimum specified for that armature, the armature is at end of life
5. Follow with stoning and polishing as above
After turning, the commutator diameter is reduced, which increases brush contact pressure from the springs. Check that the brushes can still travel their full range without bottoming out.
### Step 5: Undercutting the Mica
After resurfacing, the mica insulation between commutator bars must be recessed below the copper surface. This is called undercutting.
1. Use an undercutting file or a thin hacksaw blade ground to the correct width
2. Carefully cut the mica between every pair of adjacent bars to a depth of 0.5-1.0mm
3. Ensure the cut is centered in the gap and doesn’t damage the copper bar edges
4. Remove all mica debris with compressed air
5. Chamfer (bevel) the edges of each copper bar slightly with a fine file to remove burrs
**Why undercutting matters:** When mica is flush with or above the copper surface, the carbon brushes ride on the hard mica instead of the copper. This causes brush bounce, sparking, and rapid wear. The copper wears faster than mica naturally, but after turning they become level again — so undercutting restores the proper height differential.
Some small power tool armatures (especially low-voltage or high-speed tools) are manufactured without undercutting. Check the OEM spec — if the original commutator wasn’t undercut, don’t undercut the replacement.
### Step 6: Final Polishing and Cleaning
1. Polish the commutator surface with 600-grit silicon carbide paper while rotating
2. Clean thoroughly with compressed air from multiple angles
3. Wipe with a clean cloth and electrical contact cleaner
4. Measure final diameter and verify concentricity (less than 0.025mm runout)
5. Re-test bar-to-bar resistance to confirm no damage during resurfacing
## Commutator Maintenance Schedule
How often should you perform commutator maintenance? It depends on operating conditions:
| Usage Level | Inspection Frequency | Typical Maintenance |
|————-|———————|——————-|
| Light / occasional | Every brush change | Clean and light stone |
| Moderate / daily use | Every 3-4 brush changes | Stone or light turn |
| Heavy / industrial | Every brush change | Stone and check diameter |
| Abrasive environment (concrete, masonry) | Monthly or every brush change | Clean, stone, monitor wear rate |
A commutator can typically be turned 2-4 times before the diameter drops below minimum spec. After that, the armature needs replacement.
## Common Commutator Problems and Solutions
### Problem: Rapid Brush Wear
**Symptoms:** Brushes wearing out in days or weeks instead of months
**Causes:**
– Rough commutator surface from insufficient maintenance
– Incorrect brush grade (too soft or too abrasive)
– Contaminated commutator (oil, dust, moisture)
**Solution:** Stone or turn the commutator to restore a smooth surface. Switch to the correct brush grade for the application. Identify and eliminate contamination sources.
### Problem: Heavy Sparking on One Side
**Symptoms:** Sparking concentrated at one position in the rotation
**Causes:**
– Eccentric commutator (out-of-round)
– Lifted bar segment
– High bar (one copper segment slightly raised)
– Bearing wear causing armature wobble
**Solution:** Measure commutator runout with a dial indicator. If more than 0.05mm, turn the commutator. If a single bar is lifted or the bearings are worn, replace the armature.
### Problem: Uniform Blackening of the Commutator
**Symptoms:** The entire commutator surface appears dark or blackened
**Causes:**
– Normal oxidation from high-temperature operation
– Oil or grease contamination from leaking bearings
– Brushes that are too soft, leaving heavy carbon film
**Solution:** Clean with a commutator stone and electrical contact cleaner. Check for oil leaks from nearby bearings. Try a harder brush grade.
### Problem: Thread or Copper Winding Caught in Commutator
**Symptoms:** Visible strand of copper wire or debris wrapped around commutator bars
**Causes:** Loose armature winding wire from manufacturing defect or mechanical damage
**Solution:** Carefully remove the debris with tweezers. If winding wire has come loose from its slot, the armature is damaged and should be replaced.
### Problem: Sparking That Moves Around the Commutator
**Symptoms:** Sparking that seems to shift position as the armature rotates
**Causes:**
– Worn or uneven brush holders
– Weak brush spring tension
– Brush chatter at high RPM
**Solution:** Check brush holder alignment and spring tension. Replace springs if they show signs of fatigue. For high-speed tools, consider a softer brush grade that follows the commutator surface better.
## When to Replace the Armature vs. Repair the Commutator
Not every commutator problem is fixable. Here’s when to repair and when to replace:
**Repair the commutator when:**
– Surface has light to moderate grooving
– Surface is blackened but bars are even
– Minor fins at segment edges
– Commutator diameter is above minimum spec
**Replace the armature when:**
– Commutator diameter is below minimum spec
– One or more bars are lifted or loose
– Bar-to-bar resistance test shows a shorted winding
– Ground test shows continuity between commutator and shaft
– The growler test indicates shorted coils
– More than 4 resurfacing operations have been performed
– The armature shaft is bent or bearings are damaged
If you need a replacement armature, check our [power tool armature replacement guide](https://primearmature.com/power-tool-armature-replacement-guide/) for a complete walkthrough.
## Conclusion
Commutator maintenance is one of the most valuable skills a power tool repair technician can develop. A commutator in good condition means longer brush life, better tool performance, and fewer armature replacements.
With proper inspection, cleaning, stoning, and undercutting, you can extend the life of most armatures through multiple commutator maintenance cycles. The key is catching problems early — before surface damage progresses to electrical failure.
At Prime Armature, we supply OEM-grade armatures and stators for all major power tool brands. Every armature we ship has a precision-machined commutator with proper undercutting, ready for installation.
Have a damaged armature beyond repair? [Browse our armature range](https://primearmature.com/shop/) or contact us for technical support and bulk pricing.